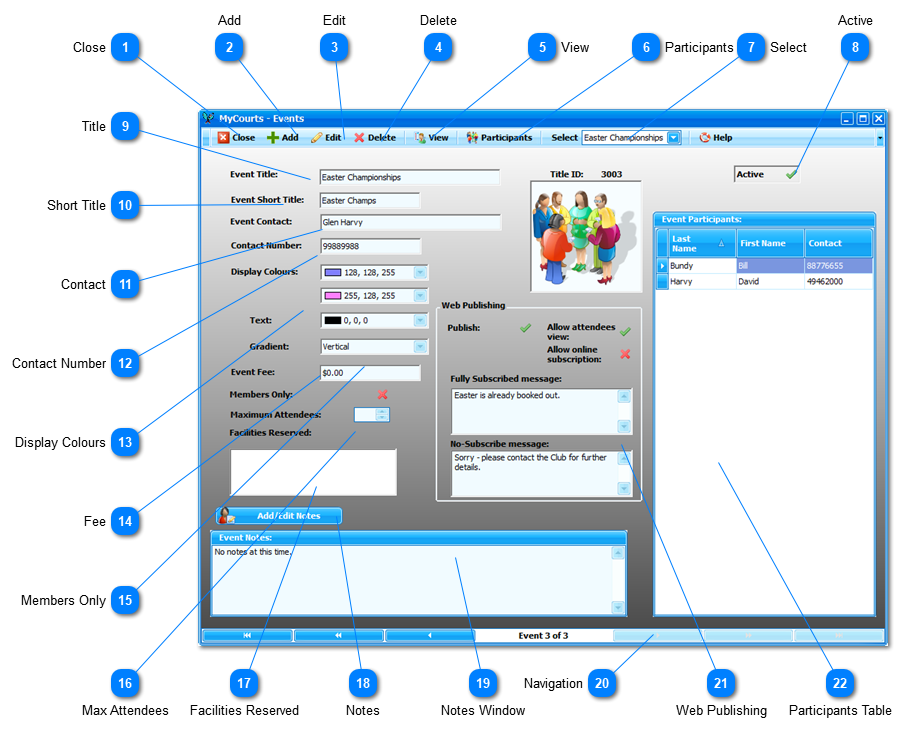
After clicking here, the text boxes will be cleared and you will be able to enter the new information into them. Also, the Menu Bar will change and will give you the options of Saving your changes or Canceling them.
To avoid the possibility of making an unwanted change or error, you will need to click here before you can make any changes to the currently displayed event.
After clicking here, The Menu Bar will change giving you the opportunity to Save or Cancel your changes.
Clicking here will delete the currently viewed event.
The event is not actually deleted, rather it is marked as "Inactive" and you may still view and edit it if you chose the View Inactive from the View menu item.
If you wish to Add a participant, click whether a Member or Non-Member and then you will be asked to either select the member from a list OR enter the Non-Member's First and Last Names as well as a contact number. If there is a fee for the event, you will then be taken to the POS window to finalise payment in the normal manner. After payment, the participant will be added to the list.
To remove a participant, first select the participant from the list by highlighting / selecting their details with your mouse. Then click on Remove.
You can add or edit the notes in relation to this event by clicking here.
Once you have clicked this button, you will be able to edit the notes below. Also a Save and Cancel button will be visible allowing you to save your changes accordingly.
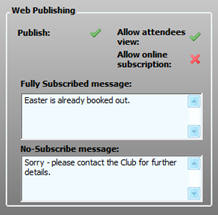
Web Publishing refers to important considerations when publishing Club Events online in real time.
Publish
Toggle on or off as to whether you wish the event to be visible on the web
Allow Attendees View
Toggle on or off as to whether you wish to have the list of attendees published on the web
Allow Online Subscriptions
Toggle to allow members to subscribe to events online.
If a fee is payable for the event then the member will need to have an account with available credit before they can subscribe.
In this web capture, all the options have been toggled on.
Fully Subscribed Message
If the Event is fully subscribed, you can display a custom message as to what options the member may have. The message must not exceed 300 characters and can include html code.
A default message will be automatically displayed if left blank.
No-Subscribe Message
If members are not permitted to subscribe online to this event, you can display a custom message as to what options the member may have. The message must not exceed 300 characters and can include html code.
A default message will be automatically displayed if left blank.