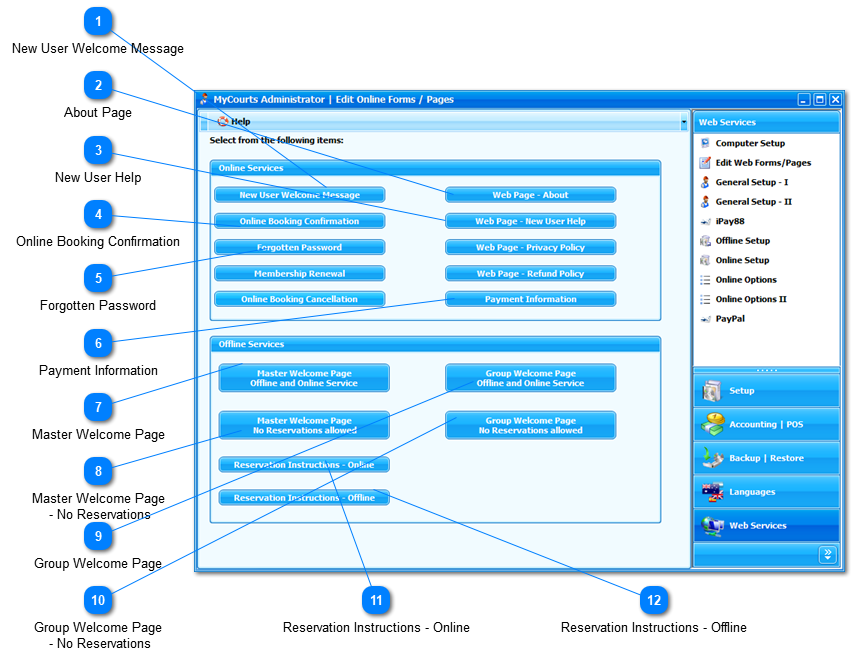
MyCourts Online and Offline web services use a number of 'forms' or controls that will eventually be used to create your web pages. The default form contents supplied with MyCourts will usually suffice to get you started however you can also edit the contents to suit your requirements.
The pages and email can be edited using MyCourts built-in HTML Editor or any other HTML Editor. The files themselves are located in the template directory which is usually located at "C:\Mycourts" and may be edited with you favorite HTML editor if you prefer. Examples of the online forms are included in this Help file. The off-line forms have 'standard' defaults and are self-explanatory.
To edit a specific form, click the respective button.
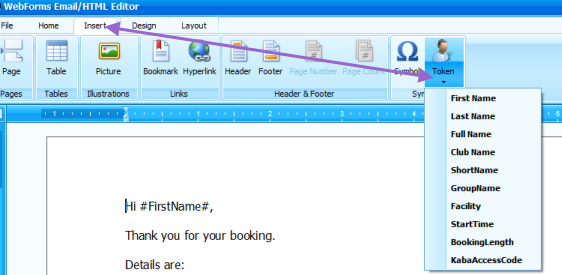
The editor also has a number of tokens you can use in your form. These tokens will be replaced with the user's or facility's details. The tokens can be selected from the 'Insert' menu or you can type them in yourself.
New User Welcome Message
This email will be sent to the new user after they successfully complete the new user signup process.
The contents of this form will be used as the format of the email sent to the online user after they have successfully completed the request for an online reservation.
If a user has forgotten their password and clicks the 'Forgotten Password' link on the online login page, the contents of this form will be used to send them their password.
The Master Welcome Page is the main or root page of your offline reservations system. It is the page you should include in your website's menu system. If you don't have more than one group of facilities, you can also use the Group Welcome Page as your root page and use it in your menu system instead. It is from this page your visitor will select the particular Group they are interested in.
This text will be displayed to the user if you allow them to make a reservation.
Like the Master Welcome Page, each Group has it's own master page. It is from this page your visitor will select the particular day's reservations they are interested in.
If you do not allow either online or offline reservations to be made, the contents of this form will be displayed to your visitors when they select a Group from the Master Welcome Page.
At the foot of the facilities reservations page, you can include instructions on how to make a reservation. In this case, the default is to provide a link to you self-hosted online web service login page.
At the foot of the facilities reservations page, you can include instructions on how to make a reservation. In this case, the default is to provide instrctions on how to complete the web form that appears immediately below this form.